DIY wood signs


We even used an old gate we had lying around.
I recruited my husband and had him reluctantly show me how to use a skill saw and nail gun. Once I got the hang of it we busted them out and I have to say I felt pretty cool wielding these manly tools. I think my husband was impressed surprised that I didn't do a bad job for my first time also.


Here's what you will need to make your own:
1.Skill saw/table saw
2.nail gun
5.old weathered pieces of wood you have lying around/or you can buy some and distress or paint it
6. 2 by 4's for backing
7.Someone who knows how to use a skill saw and nail gun/or can show you how (If you can't find someone like this take your wood to home depot and they will cut it to your desired length)
8. craft paint
9.paint brush
10. computer/printer
11.pencil/ scissors
How to make signs:
1.Cut 3 to 4 pieces of wood to equal length
2.Use 2 by 4's as backing
3.Place wood together how you want them to look
4.Use nail gun to attach 2 by 4's to back of sign
5. Screw in hangers to back
Once they were all done I set out looking for the best way to transfer words on to them. There was no way I was going to free hand it; nobody would know what they said with my scraggly handwriting.
I tried a few ways but without much success until I realized I could just make my own stencils.
How to transfer wording:
I went straight to picmonkey a very easy, no brainer editing sight for computer illiterate people like me.

When you get to the sight choose the edit image and make a white canvas, then picked out what font and size you like and print it out.
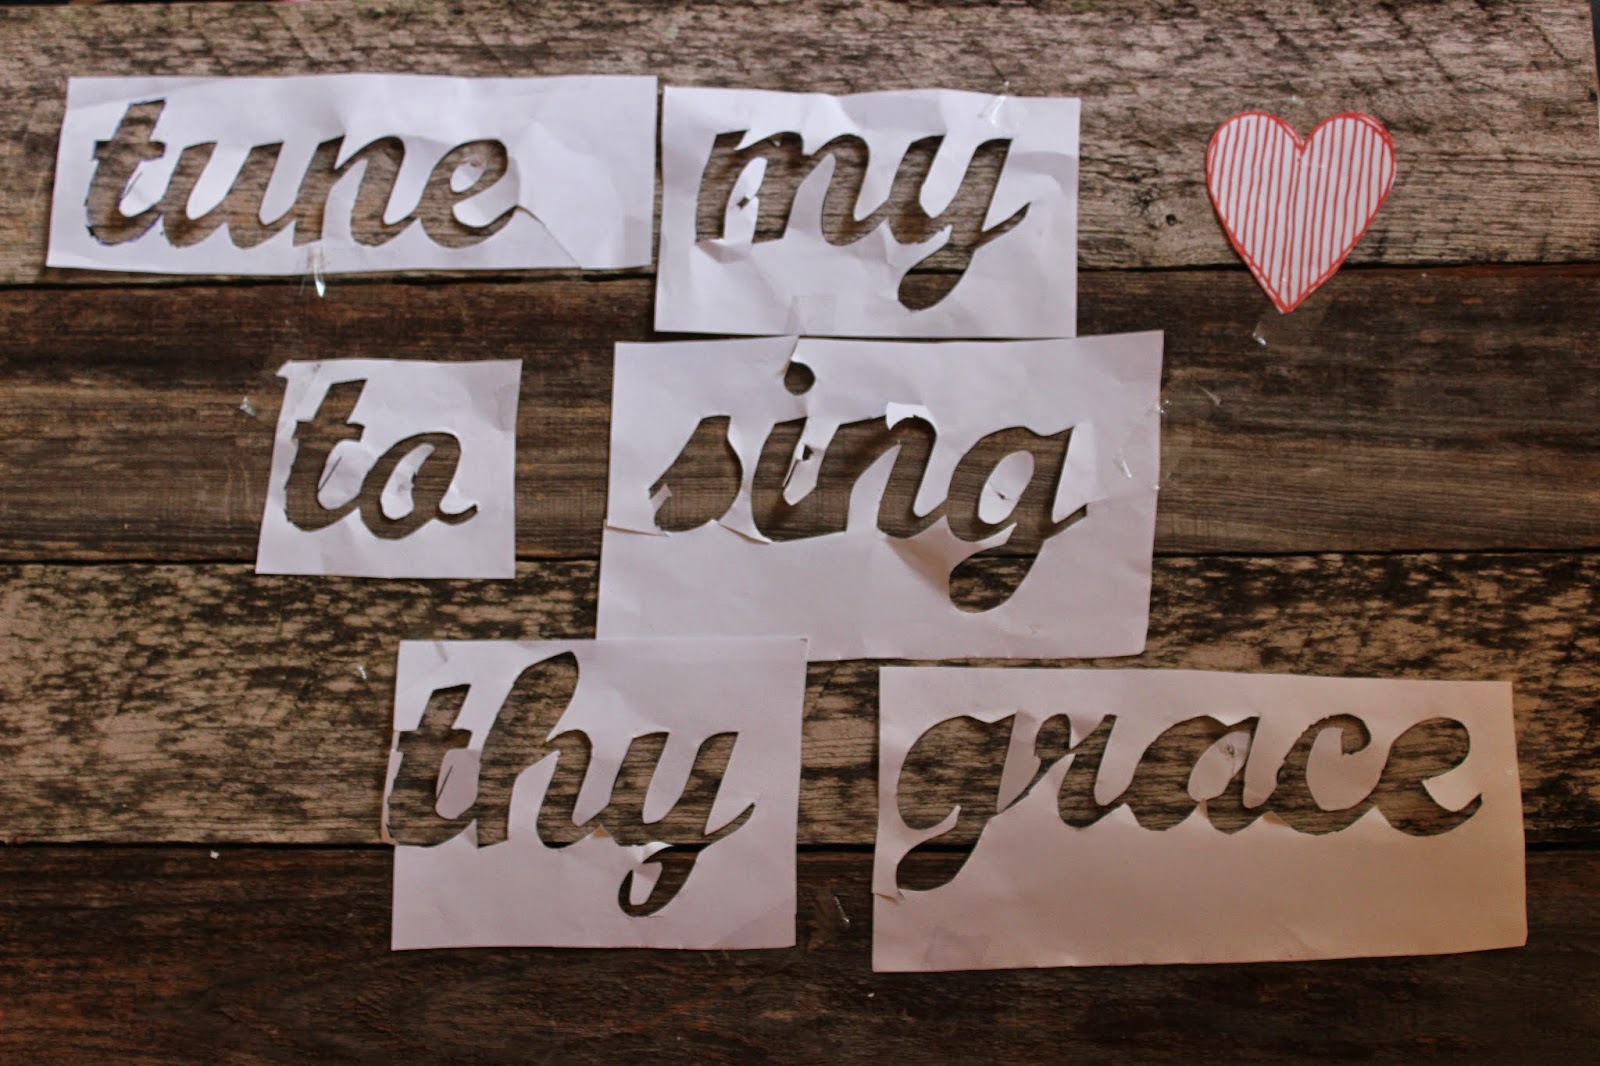
After you print out your template then comes the time consuming part: cutting it out. Remember to keep the white parts in tack, this is your stencil.You can choose just one word or a whole verse or phrase, its up to you. But once you have it cut out you can use it as many times as you want. I printed mine out on printer paper but if you want a more durable stencil you could use card stock.


I used kids scissors to cut these out
I had coupons for Micheal's and bought this paint in black, white and red and a paintbrush similar to this one.
Lay out your stencils where you want them to be then tape them down.
On the wood signs that were of finished wood I traced the stencil with a pencil and then painted in the lines. I used some pallets that were very grainy and rough and painted over the stencil with those ones. The lines weren't as clean as the ones I penciled in first but they still looked good.


I was pleasantly surprised with how good they came out and it was actually therapeutic painting them when Luke wasn't hanging on my legs and the kids were napping;0
I really want one for myself now! I wish I could keep them all but then what would I give my family? I always end up being crafty when I need a gift for someone else but never take the time for myself but this time I am going to make one for myself!
Since we already had the wood, skill saw, and nail gun I only had to buy the paint and paintbrush and hangers. All together I spent about $10 with coupons( hopefully this won't get out to the people I'm giving the gifts to) and I made 6 signs! It might have taken longer then going to the store and buying something but I would much rather spend more time at home doing something I enjoy and forgo the stress of last minute shopping and spending money I don't have!
Since we already had the wood, skill saw, and nail gun I only had to buy the paint and paintbrush and hangers. All together I spent about $10 with coupons( hopefully this won't get out to the people I'm giving the gifts to) and I made 6 signs! It might have taken longer then going to the store and buying something but I would much rather spend more time at home doing something I enjoy and forgo the stress of last minute shopping and spending money I don't have!
I love having scriptures or inspiring quotes on my walls to remind me of God's grace and truth through out my day. My home is where I spend most of my time so why not fill it with beautiful meaningful art. I know my family will love having their home decorated with uplifting decor also. Plus the fact that I didn't have to spend a fortune on them doesn't hurt;)
If you are looking for a cheap rustic/ shabby chic gift to make; look no further, this is the DIY project for you!
Disclosure: This post contains affiliate links. I will receive a small commission if you purchase an item after clicking on the link. Thanks for supporting this little blog:)
Linking up with: frugal friday, The Creative Colection, I Heart Naptime
Disclosure: This post contains affiliate links. I will receive a small commission if you purchase an item after clicking on the link. Thanks for supporting this little blog:)
Linking up with: frugal friday, The Creative Colection, I Heart Naptime


Wow, these are beautiful!
ReplyDeleteThanks Rachel!
DeleteThese are beautiful! Can't wait to try one!!
ReplyDeleteThanks! I'm planning on making some more for myself soon!
ReplyDeleteBeautiful! I have some old wood from replacing our fence with vinyl that I have been itching to do this with. Thanks for the info!
ReplyDelete